


SAMBA is an opensource software which enable the networking ( file sharing, network browsing, printing services, and interprocess communication) between Windows and Unix/Linux operating systems . For this SAMBA uses the SMB [Server Message Block] / CIFS[Common Internet File System ] protocols. SAMBA provides secure, stable and fast file and print services for all clients.Samba is an important component to seamlessly integrate Linux/Unix Servers and Desktops into Active Directory environments. It can function both as a domain controller or as a regular domain member. The latest stable release of SAMBA is 4.11.16 .
SAMBA Daemons :
Samba works on mainly three daemons as mentioned below :
1: smbd - This is the main daemon which is responisble for file sharing , printing services to windows clients,It also handle the authentication queries.
2: nmbd - The nmbd server daemon understands and replies to NetBIOS name service requests such as those produced by SMB/CIFS in Windows-based systems.The nmbd daemon is controlled by the smb service.
3: winbindd - The winbind service resolves user and group information on a server running Windows NT 2000 or Windows Server 2003. This makes Windows user / group information understandable by UNIX platforms.
SAMBA Ports
SAMBA uses ports 137 – 139 and 445 .
TCP ports: 445 [for AD] , 139 [For NetBIOS]
UDP ports: 137 [NetBIOS Name Service], 138 [NetBIOS datagram]
You can use the below commands to get more about the SAMBA ports and its services
grep -i NETBIOS /etc/services

firewall-cmd --info-service samba

SAMBA Tools & Utilities
By installing samba and samba-common-utility packages, you will get some tools which helps you to manage and control samba services. Below are some tools which are provided by SAMBA.
(i) net : Tool for administration of Samba and remote CIFS servers
(ii) pdbedit : pdbedit - manage the SAM database (Database of Samba Users)
(iii) profiles : profiles is a utility that reports and changes SIDs in windows registry files. It currently only supports NT
(iv) testparm : check an smb.conf configuration file for internal correctness
(v) smbpasswd : The smbpasswd program has several different functions, depending on whether it is run by the root user or not. When run as a normal user it allows the user to change the password used for their SMB sessions on any machines that store SMB passwords.
SAMBA Configuration File
SAMBA's main configuration files exist in /etc/samba/smb.conf . In order to enable sharing between operating system you have to set some rules. The basic format of this configuration file is as below.
Sections : The section is the name of the shared resource and the parameters within the section define the shares attributes. Sections can be declare with in the square brackets[]. In default configuration file you can find some special sections named as Global, Home, Printers etc.
Parameters : Parameters define the specific attributes of sections. Parameters are define under the sections.
Macros : Macros can be used to set the variable's string. They acts like environmental variables.
Installing SAMBA
Now we will install and configure SAMBA server in Redhat8 and then we will configure SAMBA to enable sharing with Windows machine. We will setup some scenarios where we allow open directory access , authentication based directory access and multiple directories sharing with separate authentication and access permissions. This will help us to understand smb.conf file and its parameters.
Prerequisite
1: Make sure your both Linux and Windows machines should be in same network
2: Make you internet connection enable to download and install some packages
3: Redhat or CentOS 7/8 operating system with sudo/root privileges
4: If using Virtual Box Manager then configure "NAT Network" and enable port forwarding
Note : YUM or DNF can interchangeably used to install packages
SAMBA Installation
1: If you want to know which Samba packages are required to configure SAMBA server in Redhat8, run below command
yum search samba
2: Get more info about your samba package , run below command.
yum info samba.x86_64
3: Install SAMBA package in Redhat/CentOS 8
yum install samba
Or in older version you may need to run below command
yum install samba samba-client samba-common-tools
Start SAMBA Services
1: Now run below command to start SAMBA services
sudo systemctl start smb.service
sudo systemctl enable smb.service
sudo systemctl start nmb.service
sudo systemctl enable nmb.service
sudo systemctl status smb.service
sudo systemctl status nmb.service
Adjust Firewall Rules
To get information about SAMBA service e.g its port number, run below command
sudo firewall-cmd --info-service samba
Run below command to allow SAMBA service to communicate outside.
sudo firewall-cmd --permanent --add-service=samba
Add below port number in firewall rules to allow communicate outside
sudo firewall-cmd --permanent --add-port=445/tcp
sudo firewall-cmd --permanent --add-port=139/tcp
As of now we have successfully installed SAMBA packages and allow it to communicate outside. Now we are ready to configure SAMBA share services .
Scenario 1 : Configure SAMBA share with read/write/execute permissions for any user within a workgroup without a password.
1. For this first of all we have to create a directory with appropriate permissions and access. run below command to create directory /srv/samba/share
sudo mkdir -p /srv/samba/share
Here -p flag is used to create directory parently
2. Change the ownership of directory to nobody, run below command.
sudo chown -R nobody:nobody /srv/samba/share
Above command ensure that no one holds the ownership of directories and files inside the /srv/samba/share directory
3. Setup the permissions for directory
sudo chmod -R 0755 /srv/samba/share
In above command, user who will create the file or directory have full permissions and other will have read and execute permissions so they can read files and jump inside any directory. -R flag is used to recursively set permissions.
4. Configure SELinux for SAMBA share. use
sudo chcon -t samba_share_t -R /srv/samba/share
The above command change the security context of the given directories for SAMBA share.
5. Editing /etc/samba/smb.conf file.
You can either backup default configuration file and create new one or just append your configuration in the original file.
(i) Backup original configuration file, run below command.
cp /etc/samba/smb.conf /etc/samba/smb.conf.bkup
(ii) Now open /etc/samba/smb.conf file with the help of any text editor
vi /etc/samba/smb.conf
(iii) Delete every line and put below entry inside this file and then save & exit.
[global]
workgroup = WORKGROUP
security = user
netbios name = itguyakay
log file = /var/log/samba/%m.log
log level = 1
map to guest = Bad User
guest account = nobody
[data]
comment = Data
path = /srv/samba/share
read only = No
guest ok = Yes
browsable = yes
writable = yes
guest only = yes
Note: Please change the parameters values in your file accordingly. Every parameters mentioned in file has been defined below.
Lets understand the sections and parameters defined in the above configuration file.
Sections
a): The [Global] section define the global parameters which are implemented to whole SAMBA server and it can also be used for those parameters which are not defined under other service sections.
b) The [Data] section is the name of our share. This name will be displayed when client will access the SAMBA server. Parameters defines in this share will set attributes of this share which control its behave.
Parameters
a)[ Workgroup ] : This controls what workgroup / active directory your server will appear to be in, when queried by clients.
b) [ Security ]: This will controls the authentication level of shares in the SAMBA server. Here we specified user level authentication, means client must be ask for username and password in order to access the SAMBA server.
c) [ Netbios name ] : It will be a NetBIOS name of you SAMBA server that you could access instead of IP address from windows client machine. You can set any name in this parameter.
d) [ Log file ]: The path where SAMBA creates the logs files .
e) [ Log level ] : Log level defines the information level you want , 1 for minimum logs level. Set log level to 3 if you need more information about your SAMBA share logs
f) [ Map to guest ]: To map our share with guest access we define this parameter. Here we set map to guest = bad user means no password required for guest access but a valid account should be there.
g) [ Guest account ] : This is the account name which will be assign to user when they access the share as guest user.
h) [ Comment ] : This is the comment which tells the admin the purpose of share service.
i) [ Path ] : Path of the share services e.g. files or directory
j) [ Read only ] : It defines the share access file permissions, if set 'yes' then access will be only 'read only' else it will be 'writable'.
k) [ Guest ok ] : If this parameter is 'yes' for a service, then no password is required to connect to the service. Privileges will be those of the 'guest account'.
l) [ Browsable ]: This controls whether this share is seen in the list of available shares in a net view and in the browse list.
m) [ Writable ]: Opposite of 'Read only'
n) [ Guest only ]: If set 'yes' then access of share service only available for Guest users (defined in 'guest account').
6. Check Configuration with below command
sudo testparm
if you get 'syntax okay' then you can proceed further
7. Reload samba service
systemctl reload smb.service
systemctl reload nmb.service
8. Login to Windows client machine and try to access SAMBA server with its IP/hostname. see below pic.

9. You will be able to access the SAMBA share in client machine , also you will be able to create , edit and save files in that share. See below pics.

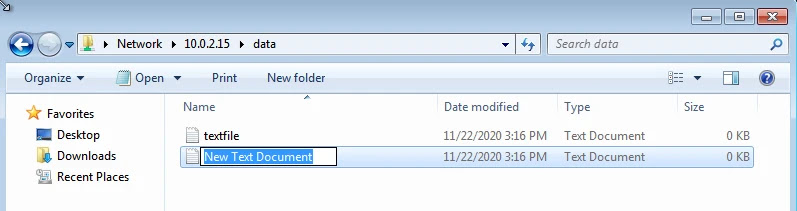

You have successfully configured SAMBA share service with read/write/execute permissions for any user with in a workgroup
Scenerio 2 : Configure SAMBA share with login authentication with read/write/execute permissions with in a workgroup
Now we configure SAMBA share with login authentication so only valid user can access the share. No else can access that share. Lets start and configure our password protected SAMBA share.
1: First of all we have to create a new user named smbuser which will be use to authenticate our SAMBA share , so only those users can access that share who have the username & password.
run below command to create a new user
useradd -M -s /usr/nologin -d /srv/samba/smbfolder smbuser
The above command will create a user name smbuser wih no valid login shell which we intentially do because we only use this user to authenticate SAMBA share. We also modify the default home directory to
/srv/samba/smbfolder which will be our SAMBA share directory.
2: Now set password for smbuser
passwd smbuser
3: Now create a group named smbgroup for our SAMBA share. Only the member of this group have the permissions to read/write/execute files and folder.
groupadd smbgroup
4: Add smbuser to smbgroup as a member.
usermod -G smbgroup smbuser
5: Now create the directory which we intentionally make home directory for smbuser
sudo mkdir -p /srv/samba/smbfolder
6: Change the ownership to smbuser and smbgroup
sudo chown -R smbuser:smbgroup /srv/samba/smbfolder
7: Set permissions for directory.
sudo chmod -R 0770 /srv/samba/smbfolder/
Here we are explicitly giving full permissions to owner and group. no permission for any other user
8: Configure SELinux for that directory
sudo chcon -t samba_share_t -R /srv/samba/smbfolder
The above command change the security context of the given directories for SAMBA share.
9: Add smbuser to SAMBA user password database (passdb). This is the password which will be used to access the SAMBA share.
smbpasswd -a smbuser
10: Now configure the /etc/samba/smb.conf file. Open file with any command based text editor
vi /etc/samba/smb.conf
11: Append the parameters shown below. Do not delete any existing configuration which we had perform in our first scenario.
[smbfolder]
path = /srv/samba/smbfolder
valid users = smbuser @smbgroup
inherit permissions = yes
guest ok = no
writable = yes
browsable = yes
Save the configuration and exit
Understand the parameters
a) [ valid users ] are the user and groups who are allowed to access the share
b) [ inherit permissions ] means permissions will be inherit from their parent directory to newly created files and directories
12: Now test our configuration for any error.
sudo testparm

13: Now reload/restart SAMBA services
sudo systemctl reload smb.service
sudo systemctl reload nmb.service
Now test your SAMBA server by accessing the share from Windows client machine. Use ip/hostname of your SAMBA server to access the SAMBA share.


Congratulation ! You have successfully configure SAMBA share with authentication access
Scenario 3: Create an SAMBA admin account & share. Give full access to all shares.
1: Create a SMB admin account & set password.
useradd -M -d /srv/samba/smbadmin -s /usr/sbin/nologin smbadmin
passwd smbadmin
2: Add user to SMB database by creating a strong SAMBA share password and enable it.
smbpasswd -a smbadmin
smbpasswd -e smbadmin
3: Create directory for smbadmin which we intend to make home directory in above command (1).
mkdir -p /srv/samba/smbadmin
4: Now change the ownership of the smbadmin home directory
chown -R smbadmin:smbadmin /srv/samba/smbadmin
5: Set the permissions for the home direcotry
chmod 2770 -R /srv/samba/smbadmin
6: Now open the /etc/samba/smb.conf file and append the below parameters in that file.
We also set some parameters in other sections as well to make user smbamdin an admin user who will have full access and permissions to any shares.
vi /etc/samba/smb/conf
a) first append below parameters , without deleting existing configuration.
[smbadmin]
comment = SAMBA Admin
path = /srv/samba/smbadmin
browseable = no
read only = no
force create mode = 0660
force directory mode = 2770
valid users = smbadmin @smbadmin
writable = yes
admin users = smbadmin
inherit permissions = yes
inherit owner = yes
b) then in smbfolder section, edit/add below parameters
valid users = smbuser @smbgroup smbadmin
force user = smbuser
force group = smbuser
admin users = smbadmin
inherit owner = yes
Save and Exit
See Below Example

Now lets understand the newly added parameters
(i) [ browseable = no ] means that our shares will not displayed in shares , but only be accessed by full path e.g { \\ip_address\folder_name }
(ii) [force create mode] means that newly created files and directories will implemented with specified permissions
(iii) [force directory mode] same as (ii) but implemented on directories
(iv) [admin users] is the root user for the specific share and have full rights/permissions.
(v) [inherit owner] means the ownership will be inherit according to parent directory
7: Verify configuration
sudo testparm
8: If Ok ! then reload/restart SAMBA services
sudo systemctl reload smb.service
sudo systemctl reload nmb.service
9: Try to access your SAMBA share from client Windows machine by pressing keys ctrl + r and type ....

Type user & password of smbadmin user. You should be able to access the share .
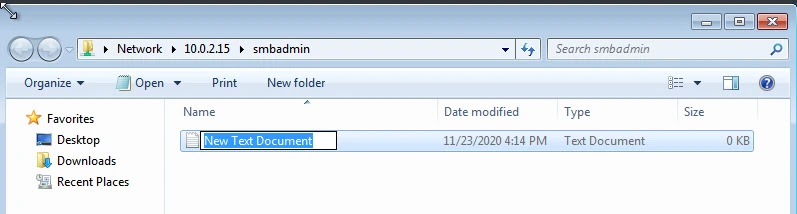
10: Now try to access the smbfolder directory. You should be able to access that directory too.

Note: If you get some error of permissions that may be if you already authenticate with another user. in that case just logoff your windows client machine and relogin and then try again
Troubleshooting
1: If your both machine (windows clinet and server) are the part of any domain , please specify the DNS IP in the network setting.
2: When configure or edit your SAMBA server , please reload the SMB services
3: If some how changes not appear in the client machine , try to log off and log on Windows client machine
4: When create a new user for SAMBA server , set user password before adding user to SMB password database


0 Comments