


Apache is one of the most popular and used Web Server in the world. Almost 35 percent Web Servers are configured with Apache. Current version of Apache Web Server is Apache2. In this post we will see how to install , configure and manage Apache Web Server in Debian10 (codename : buster). Also we will do virtual web hosting for multiple websites.
Pre-Requisite
You have to configure your system with sudo previleges. You should have internet connection in case to download any required package. Lets start ...
Installing Apache
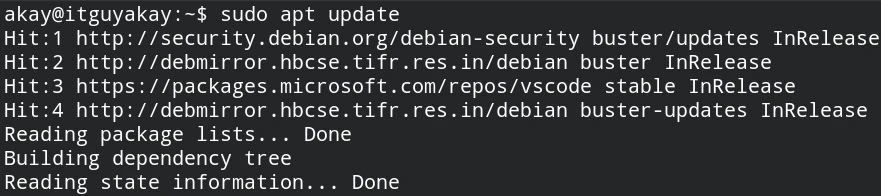
1: Make sure your system is up to date , run below command to check or update your system.
sudo apt update
Example :
2: Install Apache package in your system with below command.
sudo apt install apache2
3: Start Apache Web server and make it available at boot with below command.
sudo systemctl start apache2
sudo systemctl enable apache2
4: Now check the status if Apache Web server is up and running .
sudo systemctl status apache2
Now our Apache Web Server has been installed succesfully. Next we have to configure firewall to allow Apache Web Server access through web browser through its default port number.
Adjusting Firewall Rules
5: We are using ufw netfilter firewall as firewalld has some issue with debian buster. You should have to disable your firewalld services before configuring ufw for your system if its enabled
sudo systemctl stop firewalld
sudo systemctl disable firewalld
sudo systemctl status firewalld
6: Now install ufw in your system with below commands.
sudo apt install ufw
7: Enable ufw with below command
sudo ufw enable
8: Now add WWW in your firewall rule to allow access of Apache Web Server from outside world
sudo ufw allow 'WWW'
9: Verify if it is allowed or not by ufw firewall
sudo ufw status
Example:

10: Just verify if Apache services are running properly or not
sudo systemctl status apache2
11:Check your system ip/hostname in order to access the default webpage through your browser
hostname -I
OR
hostname
12: Open web browser and enter the ip address of your machine. You should be able to access the default landing page of apache server.
Example

If you have configured your Apache Web Server inside a Virtual Box Manager, just enable port forwarding with NAT configuration. See below Pic

How To Manage Apache Web Server
Now we will see how can be manage our running apache web server
1 : To stop Apache Web Server
systemctl stop apache2
2: To start Apache Web Server
systemctl start apache2
3: To restart/refresh Apache Web Server
systemctl restart apache2
4: To reload Apache Web Server configuration
systemctl reload apache2
5: To auto start Apache Web Server after system boot
systemctl enable apache2
6: To stop auto start Apache Web Server after system boot
systemctl disable apache2
Configuring Virtual Web Host Server
Now we will configure our Apache Web Server to host multiple sites. This is something like server blocks in NGINX web services. This is useful when we want to host multiple websites from single server.
Note: Please replace the my_site option with your site name in below commands.
As we know that the default Root Document path for Apache Web Server is /var/www/html . So for virtual web hosting we have to create an another directory in the same path. Lets do that...
1: Create a folder in Document Root Path with below command.
sudo mkdir -p /var/www/my_site
2: By defautl ownership is transfered to root user , you can change the ownership with any another user who will responsible for managing Apache Web Server. Here we are tansferring ownership to $USER environmental variable
sudo chown -R $USER:$USER /var/www/my_site
3: Set appropriate permissions for the directories and files
sudo chmod -R 755 /var/www/my_site
4: Now create an index.html file inside the /var/www/my_site/ directory. And put some HTML code inside it.
sudo vim /var/www/my_site/index.html
HTML Code Example:

5: Now save the file with :x keys and hit enter to exit.
Now we have to tell Apache Web Server where to look for the configuration for our newly created virtual web server. For this we have to create a configuration file under /etc/apache2/site-avaialble/ . You can given any name to your configuration file but for the convience we will give same as the our virtual web server directory name.
6:Creating a configuration file for our virutal web server
sudo vim /etc/apache2/site-avaialble/my_site.conf
7: Set configuration parameter for our virtual web server. Put below configuration inside the conf file.
<VirtualHost *:80>
ServerAdmin admin@your_email_domain
ServerName my_site
ServerAlias www.my_site
DocumentRoot /var/www/my_site
ErrorLog ${APACHE_LOG_DIR}/error.log
CustomLog ${APACHE_LOG_DIR}/access.log combined
</VirtualHost>
In above configuration parameters :
(i): first line defines the virtual host web server's default port number
(ii): second line defines the server admin's email ID
(iii): third line defines name of the your website
(iv): fourth line defines alias for your site
(v): fifth line defines the Document Root path where the apache will look for the html file to server the content.
(vi): sixth and seventh line define the Errorlogs and custom logs directories
8: Now disable the default configuration file and enable our virtual webhost configuration file so system will look it by default
To Disable Default Config File
sudo a2dissite 000-default.conf
To Enable Virtual Web Host Config File
sudo a2ensite my_site.conf
9: Now test our configuration file
sudo apache2ctl configtest
after running above command you should get the succes code "OK". Then only you can proceed further else check the error in configuration file
10: Restart and reload the Apache service
sudo systemctl restart apache2
11 : Now open /etc/hosts file with any text editor(e.g vim or nano) and append below line in order to map your website name with you machine's ip address. see example below.
vim /etc/hosts
ip_address my_site

12 : Go to browser and enter http:my_site . You should be able to get content of your html file as looks like below.

13 : If you are running your virtual host web server in your Virtual Box Machine then either you can try with below command
curl my_site
OR
14 : You have to configure virtual machine with NAT configuration and enable port forwarding then open browser in host machine and type your my_site with forwarded port number

Thats All, Thank you!


0 Comments